Captain Guide · Version 1.0

Drive, earn, repeat.

Everything you need to start earning with XOOM — register your vehicle, publish routes, accept ride requests, and manage your daily journeys like a pro.

Read time
10 minutes
Steps covered
12 essentials
City
Karachi
[ Table of Contents ]
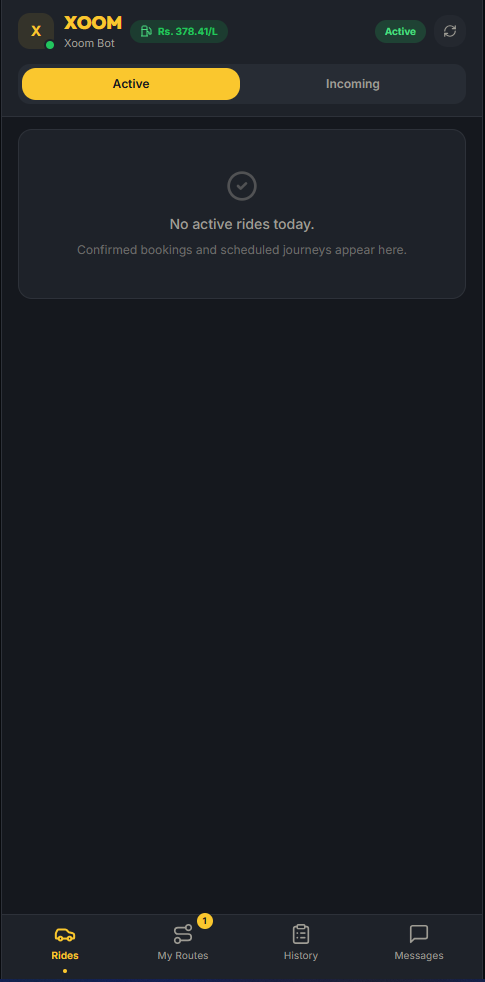
STEP 01 / GET STARTED

Register as Captain

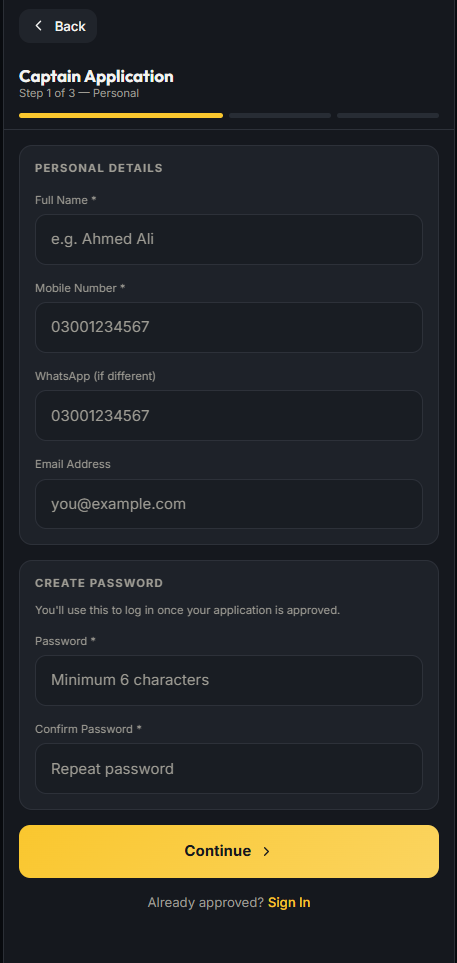
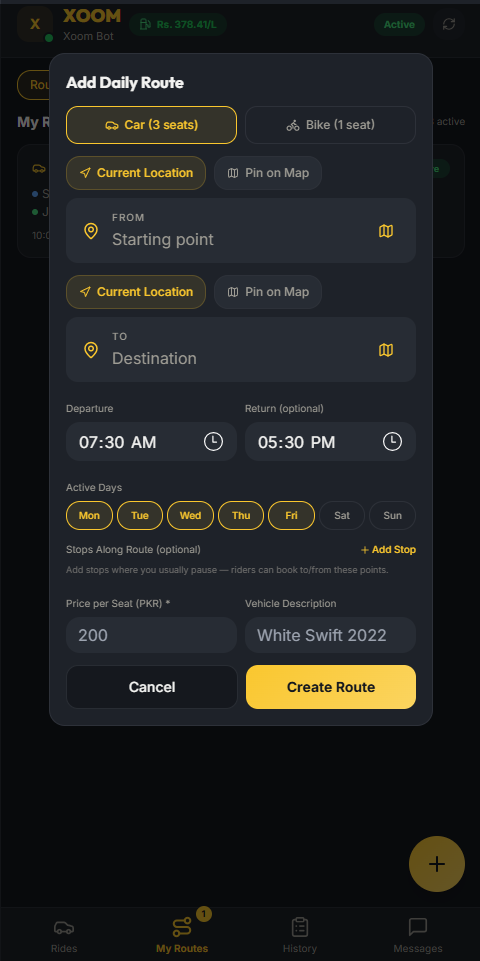
Becoming a captain on XOOM takes under a minute. Register with your basic details and you're ready to start setting up your profile.

  1. Open the XOOM Captain app at captain.xoomrides.com.
  2. Tap Register to open the sign-up form.
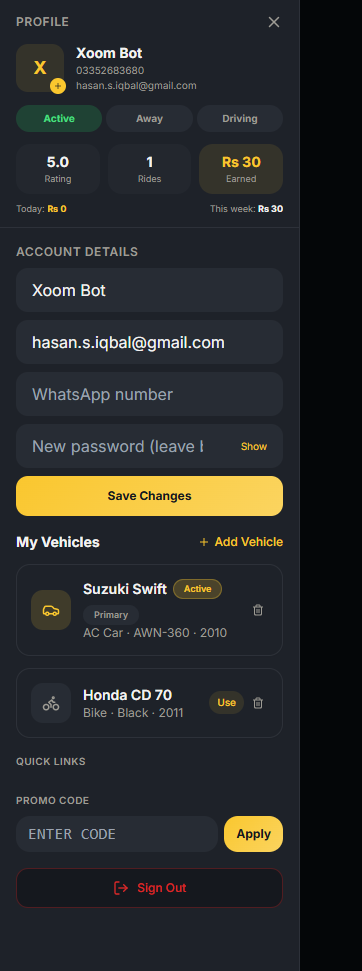
  3. Enter your full name, phone number (format: 03XXXXXXXXX), and email address.
  4. Tap Create Account — your login password will be emailed to you or shown on screen.
ImportantUse a phone number that riders can reach you on. This number will be visible on your route listings and booking confirmations.
Register Captain registration screen
STEP 02 / ACCESS

Login & forgot password

Already registered? Log in with your phone and password. If you've forgotten your password, reset it in seconds — a new one will be sent to your email.

  1. Open the Captain app and tap Login.
  2. Enter your phone number and password.
  3. Forgot your password? Tap the Forgot Password tab.
  4. Enter your registered phone number — a new password will be emailed to you immediately.
  5. Check your email, copy the new password, and log in again.
Heads upAfter resetting, save your new password somewhere safe. You can change it later from your profile settings.
Login Captain forgot password screen
STEP 03 / SETUP

Add city & vehicle

Before you can publish routes, XOOM needs to know where you operate and what you drive. Set your city and add your vehicle details.

  1. After first login, you'll be prompted to complete your captain profile.
  2. Select your city from the dropdown (currently Karachi).
  3. Choose your vehicle type: Car, AC Car, or Bike.
  4. Enter your vehicle make, model, year, color, and license plate number.
  5. Set the number of seats available for passengers (excluding the driver).
Accuracy mattersRiders see your vehicle details when they book. Correct information builds trust and avoids confusion at pickup.
Vehicle Add city and vehicle details screen
STEP 04 / VERIFY

Verification documents

Upload your identity and vehicle documents so riders know they're in safe hands. Verified captains get a trust badge and higher booking rates.

  1. Navigate to your Profile and tap Verification Documents.
  2. Upload a clear photo of your CNIC (front side).
  3. Upload your driving license.
  4. Upload your vehicle registration document.
  5. Wait for the XOOM team to review and approve your documents (usually within 24 hours).
Pro tipTake photos in good lighting with all text clearly visible. Blurry or cropped documents will be rejected and delay your verification.
Verify Verification documents upload screen
STEP 05 / ROUTES

Add a route

Publish your daily commute as a route and let riders book seats. You set the pickup, drop-off, departure time, and XOOM calculates the fare automatically.

  1. Go to the My Routes tab and tap the + Add Route button.
  2. Set your From location — use current location or pin on the map.
  3. Set your To location — the destination of your daily commute.
  4. Choose your departure time (morning or evening window).
  5. Optionally add intermediate stops along your route (up to 5 stops).
  6. Review the route map and fare estimate, then tap Save Route.
LimitYou can have up to 3 active routes at a time. This keeps your schedule manageable and ensures quality service for your riders.
Add Route Add a new route screen
STEP 06 / MANAGE

My routes & editing

Your routes are always editable. Change the departure time, update stops, or temporarily disable a route — it's all under My Routes.

  1. Tap the My Routes tab to see all your published routes.
  2. Each route card shows the from/to, departure time, vehicle, and seats available.
  3. Tap any route to expand it and see the full details.
  4. Tap Edit to modify the departure time, stops, or route details.
  5. Changes take effect immediately — existing confirmed bookings are preserved.
Good practiceKeep your route times accurate. Riders rely on your schedule — consistent timing builds repeat bookings and better ratings.
My Routes Edit routes screen
STEP 07 / OFFERS

Manage your offers

When riders post ride requests near your route, you can send them a seat offer with your price. Track all your pending and accepted offers here.

  1. Go to the Rides tab — you'll see incoming ride requests that match your routes.
  2. Tap Offer Seat on any matching request to make your bid.
  3. Set your offered price — the system suggests a fare based on distance, but you can adjust.
  4. Once submitted, your offer appears under Manage Offers with its status: Pending, Accepted, or Declined.
  5. If the rider accepts, the booking is auto-confirmed and you'll get a notification.
StrategyCompetitive pricing wins more bookings. Riders see offers from multiple captains — fair prices and good ratings make you stand out.
Offers Manage offers screen
STEP 08 / INCOMING

Incoming requests

Riders across Karachi are posting ride requests every day. Browse requests that match your route and offer them a seat — you set the price.

  1. Open the Rides tab to see all incoming ride requests in your area.
  2. Each request shows the rider's pickup, drop-off, preferred time, and budget (if set).
  3. Requests matching your route are highlighted — tap to see route overlap on the map.
  4. Tap Offer Seat to respond with your price and available seat.
  5. The rider gets notified and can accept or decline your offer.
NotificationYou'll get a push notification when new requests match your route. Enable notifications to never miss an earning opportunity.
Requests Incoming ride requests screen
STEP 09 / ON THE ROAD

Active rides

When it's time to drive, your active ride shows all confirmed passengers, their pickup points, and quick actions for marking attendance.

  1. Your confirmed journey appears at the top of the Rides tab on the day of travel.
  2. Tap Start Journey when you begin your route (only available within 30 minutes of scheduled time).
  3. See all confirmed passengers with their names, phone numbers, and pickup locations.
  4. Mark each passenger as Picked Up or No Show as you reach their stop.
  5. When all stops are done, tap End Journey to complete the ride.
  6. Passengers will confirm completion on their end — fares are finalized after both sides confirm.
TimingYou can only start a journey within 30 minutes of the scheduled departure. Starting too early or too late is not allowed — this protects your riders' plans.
Active Active rides screen
STEP 10 / TRACK

Ride history

Every journey you've completed, every booking you've served — all recorded with timestamps, route details, and passenger counts.

  1. Tap the History tab to view all your past rides.
  2. Each entry shows the journey code, route, date, and status (Completed, Cancelled).
  3. See the number of passengers served and total earnings per trip.
  4. Use history to track your daily and weekly performance.
EarningsYour ride history is your earning log. Use it to plan better routes and times based on when you get the most bookings.
History Ride history screen
STEP 11 / FLEET

Manage vehicles

Own multiple vehicles? Add them all to your profile and switch between them when creating routes. Each vehicle has its own seat count and type.

  1. Open your Profile and tap Manage Vehicles.
  2. See all your registered vehicles with their details.
  3. Tap Add Vehicle to register a new car or bike.
  4. Enter the make, model, year, color, plate number, and seat count.
  5. When adding a new route, you can select which vehicle to use for that route.
FlexibilityDrive a car on weekdays and a bike on weekends? Add both and create separate routes for each — riders will see the correct vehicle info.
Vehicles Manage vehicles screen
STEP 12 / YOU

Profile details

Your captain profile is your identity on XOOM. Keep it updated — riders check your profile before booking, and a complete profile builds trust.

  1. Swipe from the left edge or tap the menu icon to open the profile drawer.
  2. View and update your name, email, and phone number.
  3. See your verification status — whether your documents are approved.
  4. Access Manage Vehicles, Verification Documents, and Settings from here.
  5. Tap Logout to sign out of your captain account.
Trust factorCaptains with complete profiles — verified documents, accurate vehicle info, and a real photo — get significantly more ride requests.
Profile Captain profile details screen